 Prerequisite
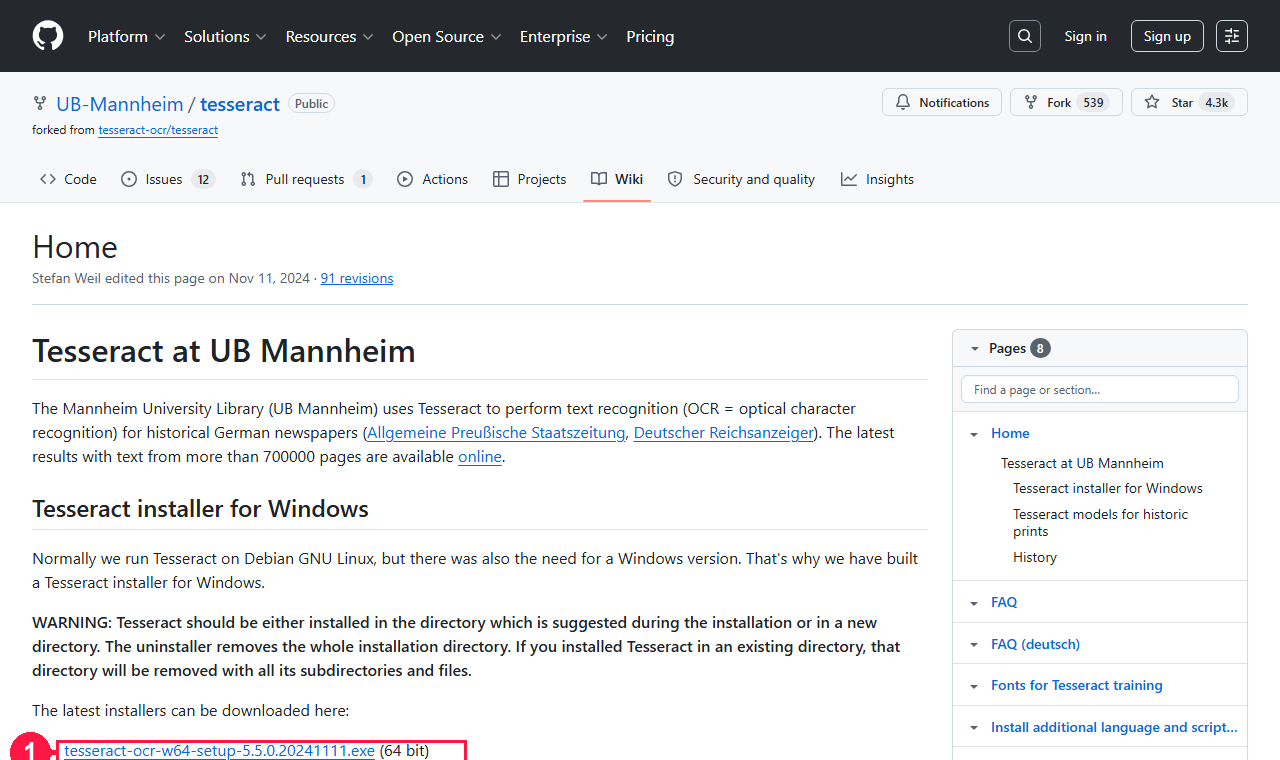
1. Install Tesseract OCR
Grab the 64-bit Windows installer from github.com/UB-Mannheim/tesseract. Add it to PATH during setup, or point TESSDATA_PREFIX at a user-writable tessdata folder that already contains the language packs you need.
 Step 1 · Get it
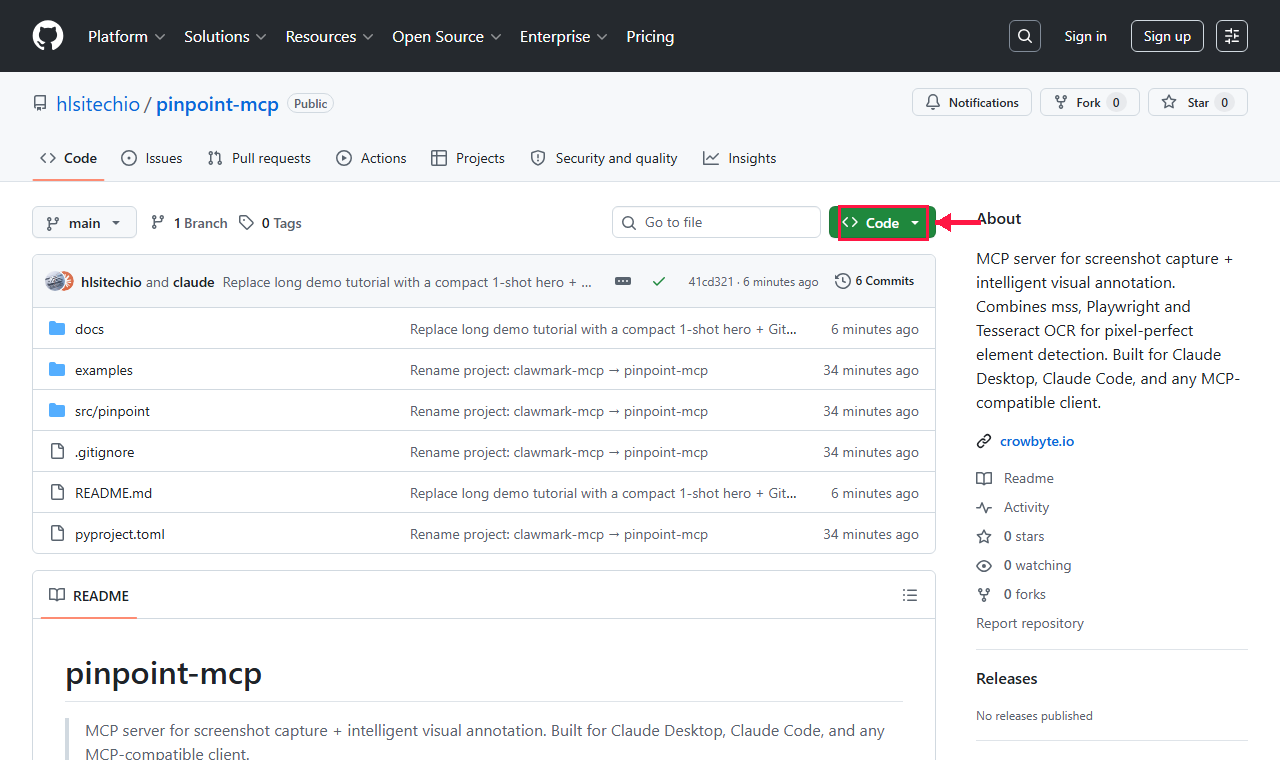
2. Open the repo on GitHub
Head to github.com/hlsitechio/pinpoint-mcp. Click the green Code button to copy the HTTPS clone URL — that's what you'll paste into git clone on the next slide.
 Step 2 · Clone
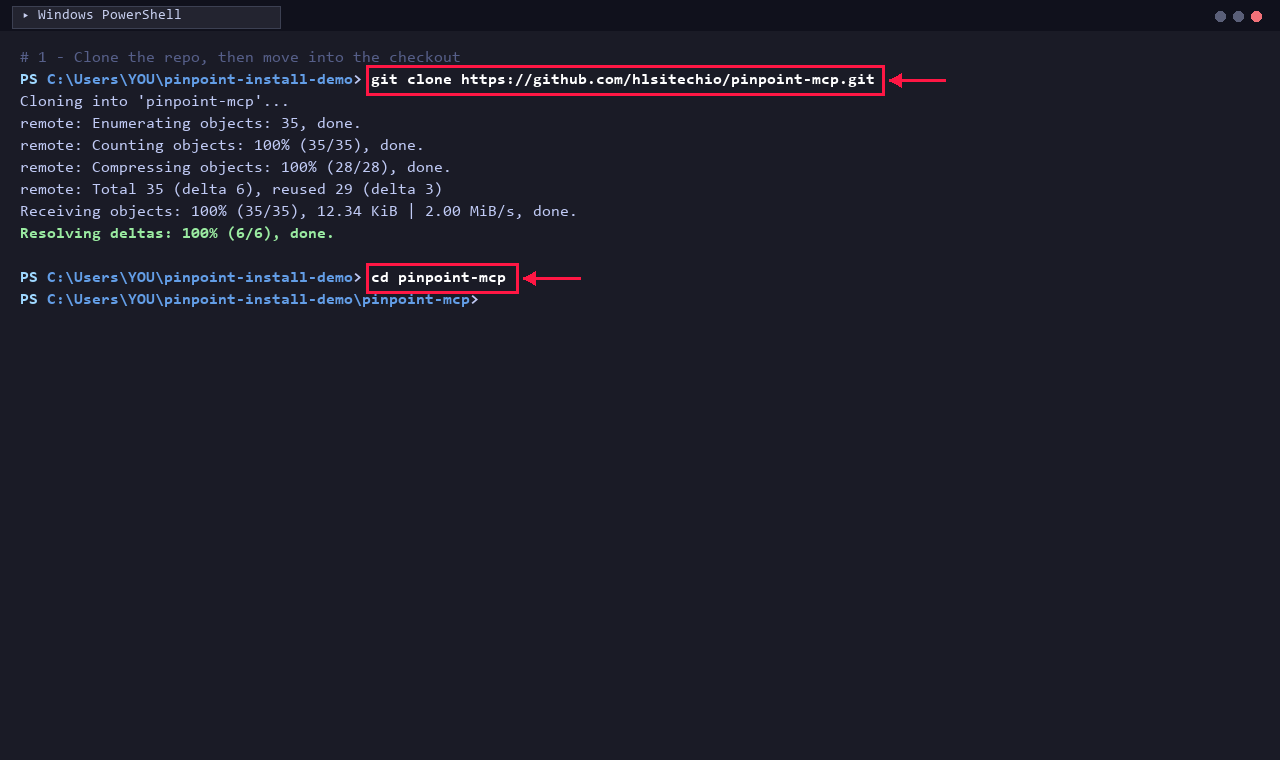
3. Clone the repository
git clone https://github.com/hlsitechio/pinpoint-mcp.git then cd into the checkout. ~35 objects, ~13 KiB — takes under a second on any connection.
 Step 3 · Install
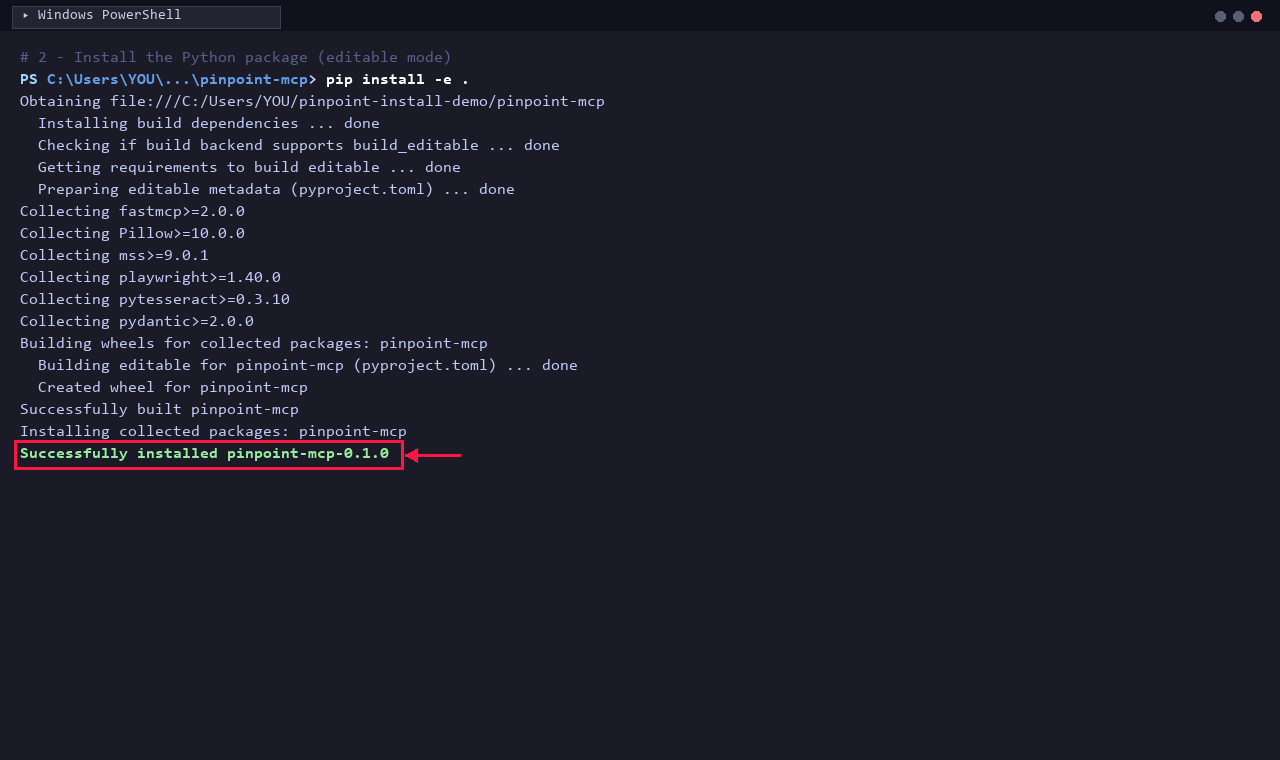
4. Install the package (editable)
pip install -e . pulls FastMCP, Pillow, mss, Playwright, pytesseract and pydantic — then registers pinpoint-mcp as an editable wheel so source edits reload without reinstalling.
 Step 4 · Browser
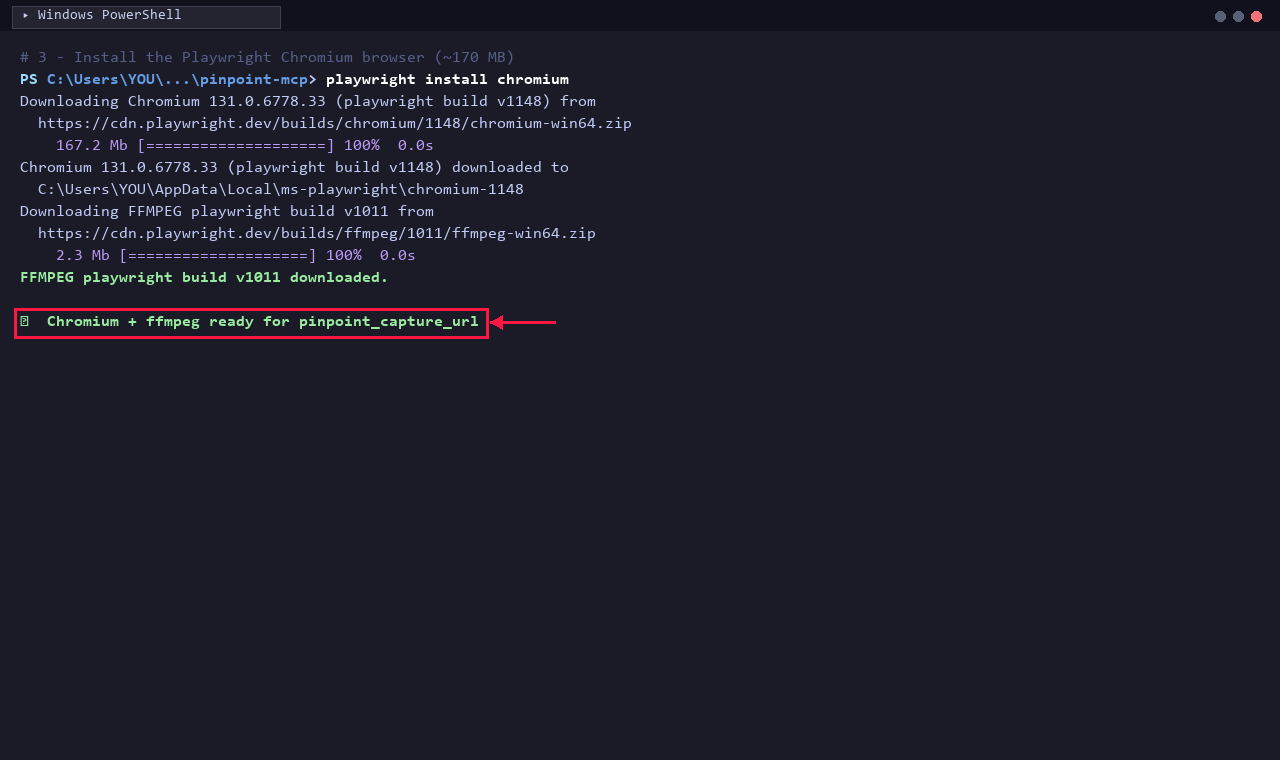
5. Install the Playwright browser
playwright install chromium fetches a self-contained Chromium build and the bundled ffmpeg. Required for pinpoint_capture_url and the DOM-based pinpoint_find_web_element.
 Step 5 · Configure
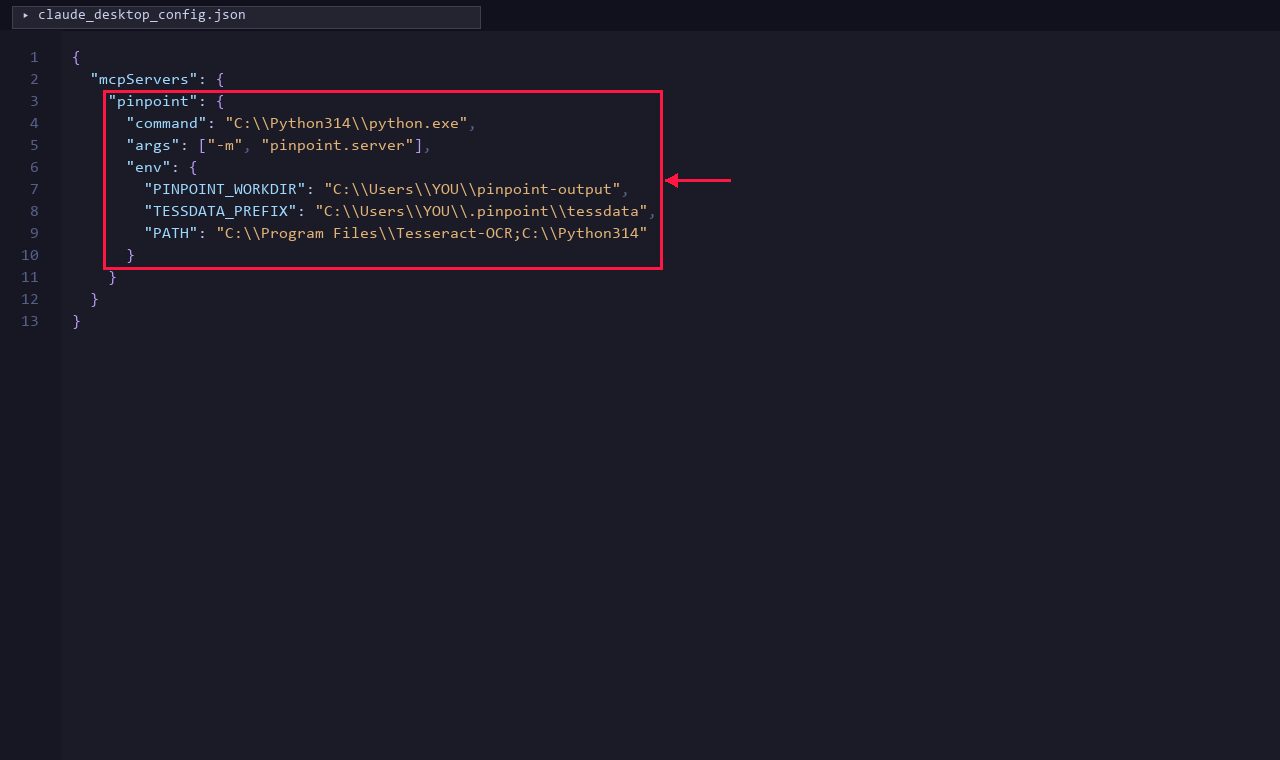
6. Register the MCP server
Add a pinpoint entry to %APPDATA%\Claude\claude_desktop_config.json pointing at python -m pinpoint.server. Set TESSDATA_PREFIX + PATH so Tesseract and its language packs are reachable from the spawned subprocess.
 Done
Done
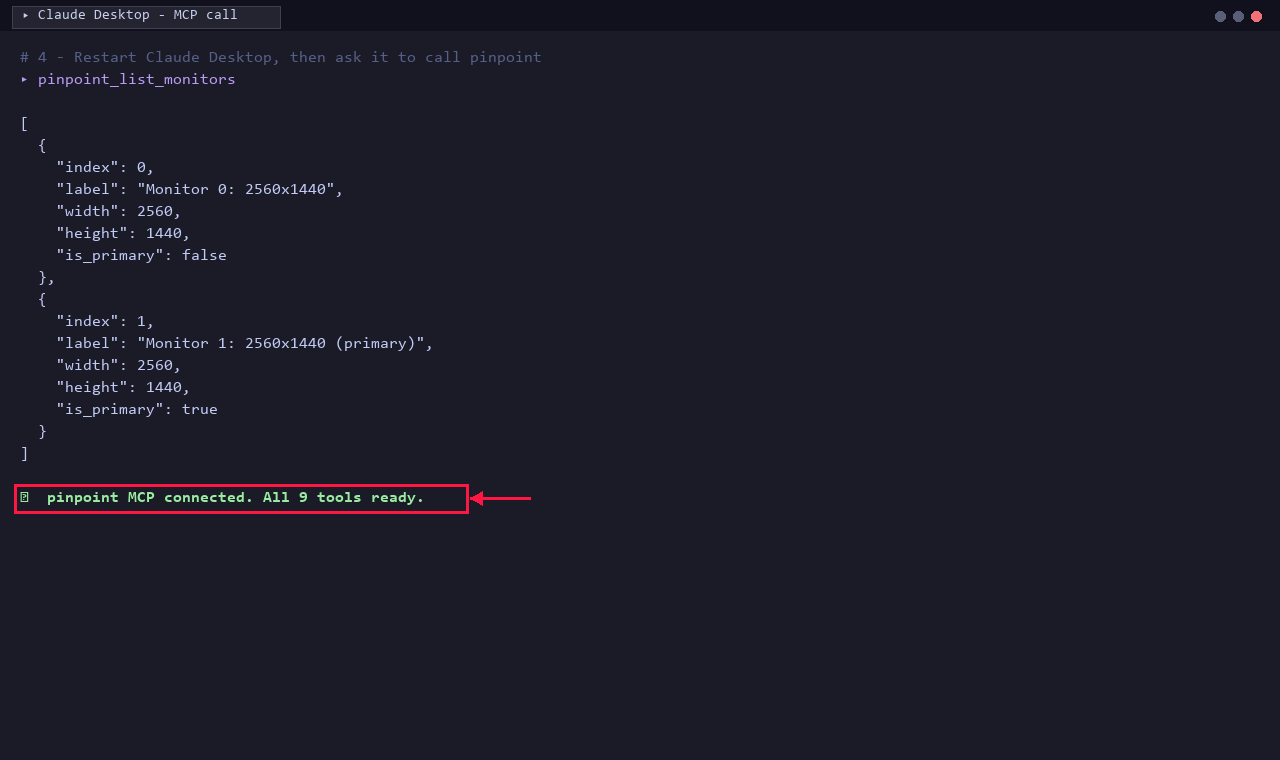
7. Verify in Claude Desktop
Fully quit Claude Desktop (tray icon → Quit), then relaunch. Ask Claude to call pinpoint_list_monitors — a successful JSON response like the one above means all 9 pinpoint_* tools are wired up and ready.